Using the Allegro Dropshipping App is really simple and you will find everything working if you can follow the simple step-by-step guide. There are some simple steps you need to follow before you start using the software for the first time.
- Account Setup.
- Setup & Import Settings from a Previously Listed Product (For shipping, payment, and other info).
- Update Pricing Formula.
After completing the 3 steps, you are ready to start using the software.
Step 1 – Account Setup
At first, go to the “Account Setup” tab. You need to create API credentials for this step. Your normal username/email and password-based authentication will not work. Please follow the guide below to create the API credentials. It will take not more than 2 minutes.
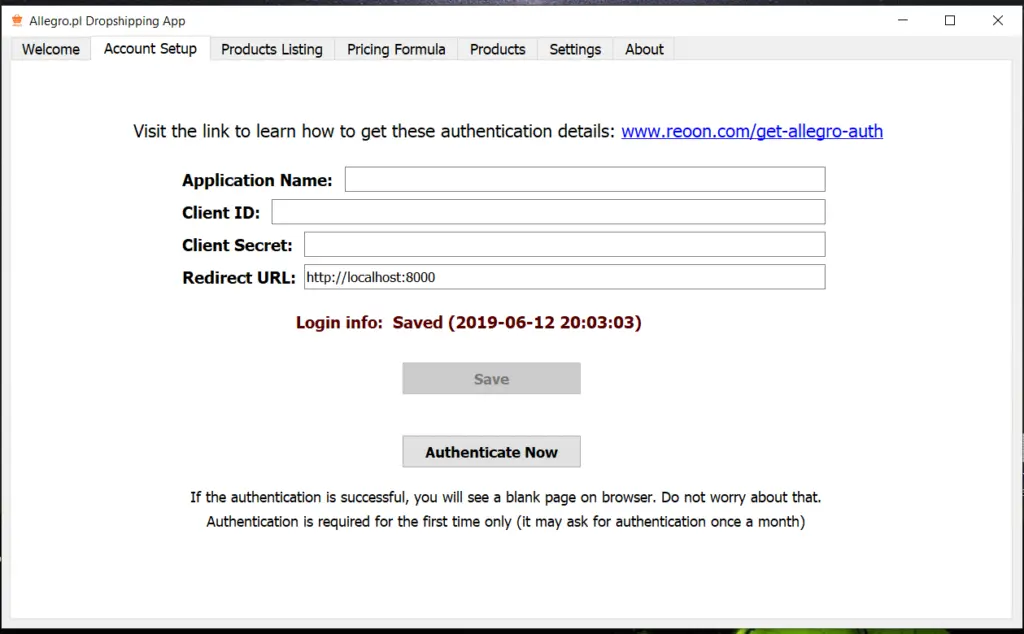
To get the app authentication credentials, you have to register an app first. To register App, please follow the steps below.
1. At first login to your seller account (allegro.pl).
2. Go to the following link: https://apps.developer.allegro.pl/new
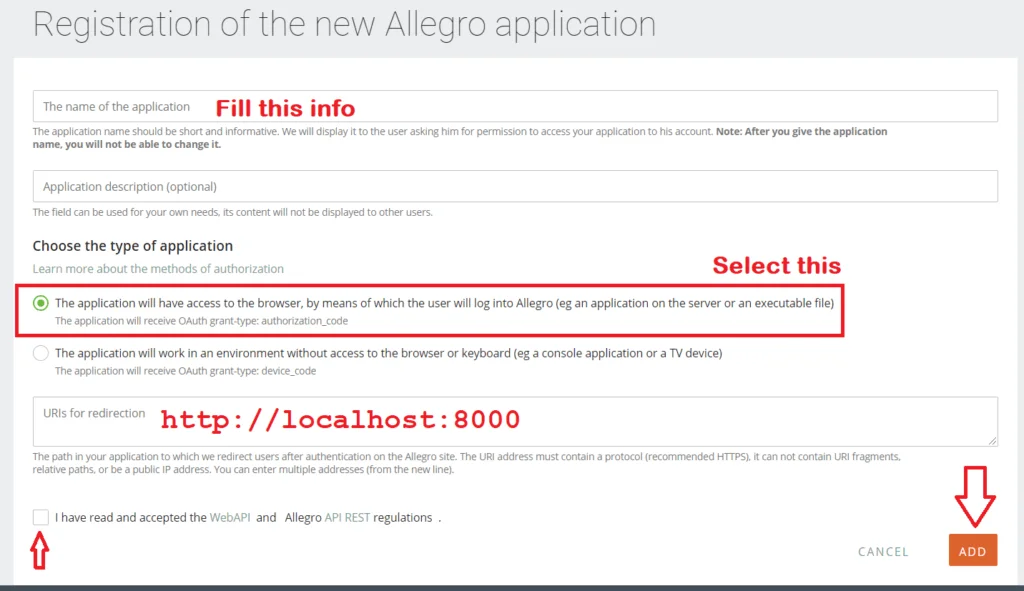
3. Enter the App Name and select “The Application will have access to the browser” option.
4. Then type http://localhost:8000 in the “URL Redirection” field. Make sure you entered this exactly in the same way.
5. Make sure to allow proper permissions.
6. Then accept the terms and click on “ADD/Register” button. Check the image for better understanding.
7. Then on the next page, you will find all the necessary information. (if it doesn’t redirect, then visit: https://apps.developer.allegro.pl/)
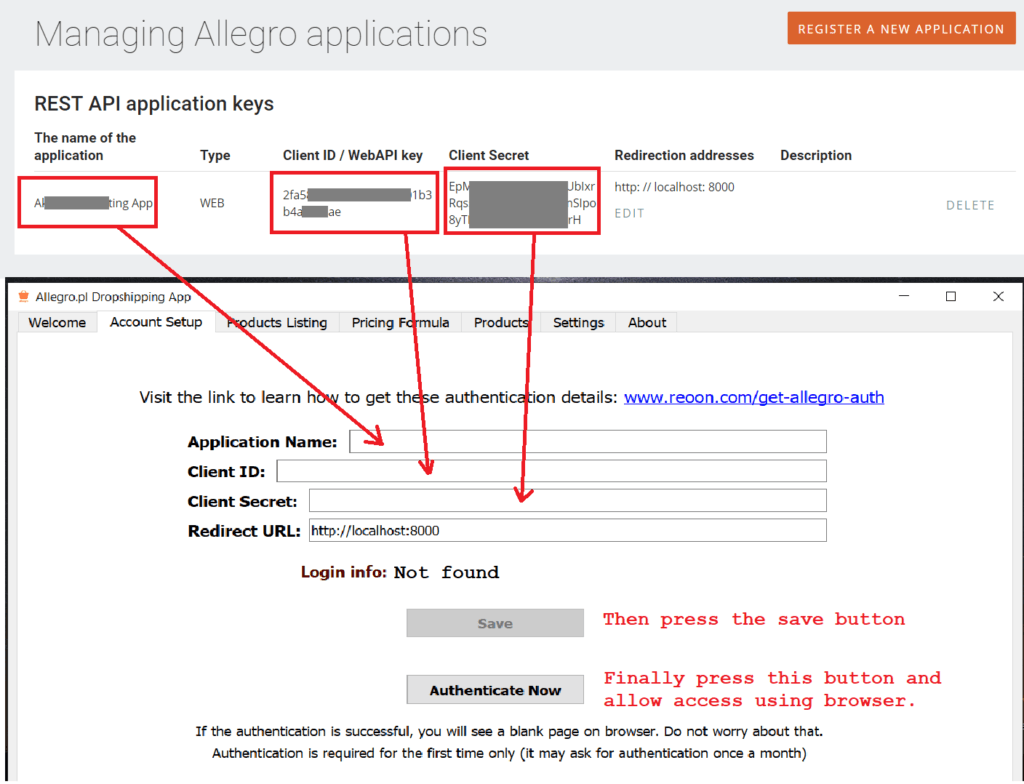
8. Copy all the authentication details from the webpage to the software (like the above image) and save.
9. Finally press the “Authenticate Now” button. It will open the Allegro site on the web browser. Login to allow access. If everything is ok, you will see a blank page (white page). Go to the next step and start doing things. If something is wrong with your authentication, it will ask you again to authenticate.
Step 2 – Setup & Import Settings from a Previously Listed Product
Shipping, delivery and after-sale services info are imported from one of your previously listed products (and copied to the new ones).
We believe some settings are a lot easier to set on the web browser. So we made it this way. All you have to do is list a product manually (publish/draft), and set all the necessary delivery, shipping, payment and after-sales services information on that product (manually).
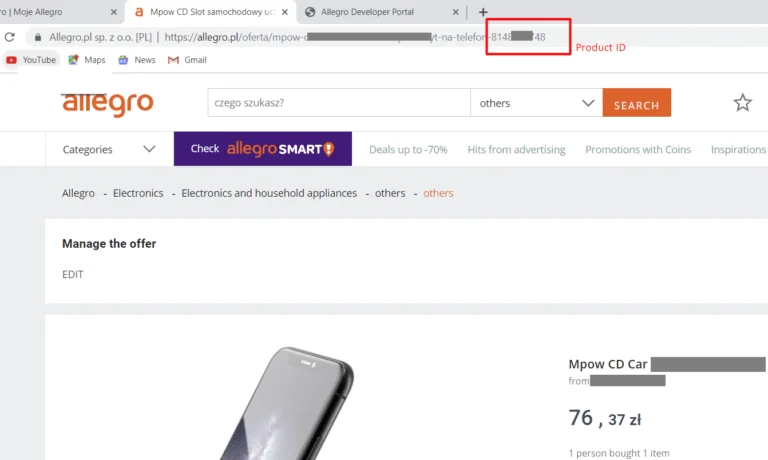
Finally, go to the “Product Listing Tab” of the software, enter the product ID of that product, and press the import button. If everything is correct, It will show the information on the software.
Where to find the product ID? Look at the images below:
Step 3 – Setup Pricing Formula
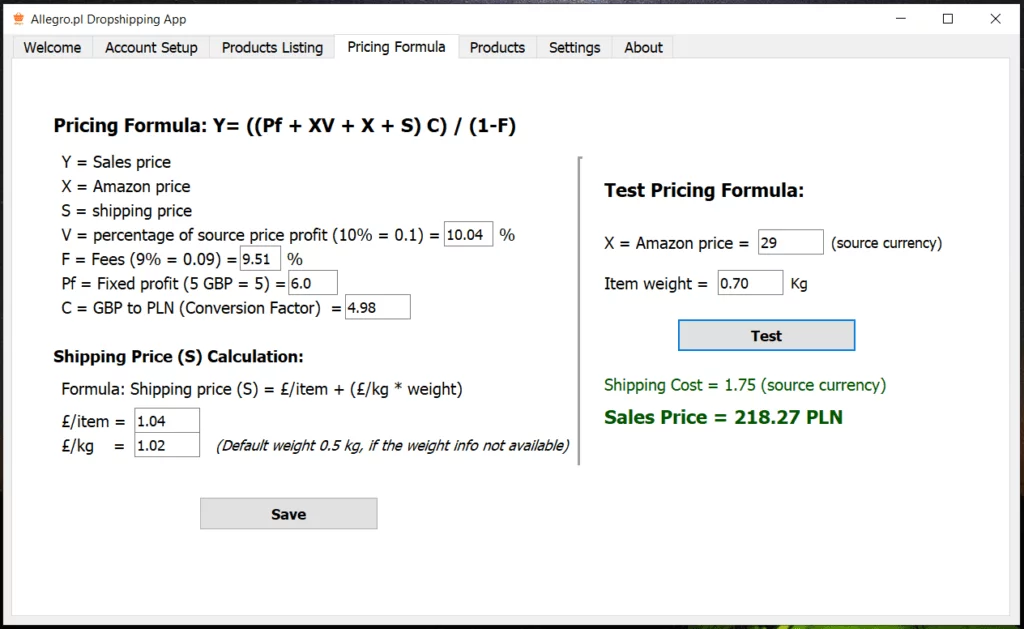
The Pricing formula is used to reprice the product from the Source Price to your new price. Fill all the required fields and test it before using. Pricing formula is not global. Pricing formula will be used independently with each product. So if you need to set different pricing for different products, change the pricing formula before you list them. Or you can update the pricing formula from the products tab anytime.
If you do not understand anything, please contact our customer support.
Check our Allegro Dropshipping App: Reoon Allegro Dropshipping App

